Can I get an overview of Incidents
The following article will present an overview of incidents.
Incident Overview
Incidents consist of incidents of various types. Depending upon the type, we can build different processes. The process is made up of “building blocks” that we call “action steps”.
In some Organizations, some incidents (such as medical errors) are also known as "Simple Events".
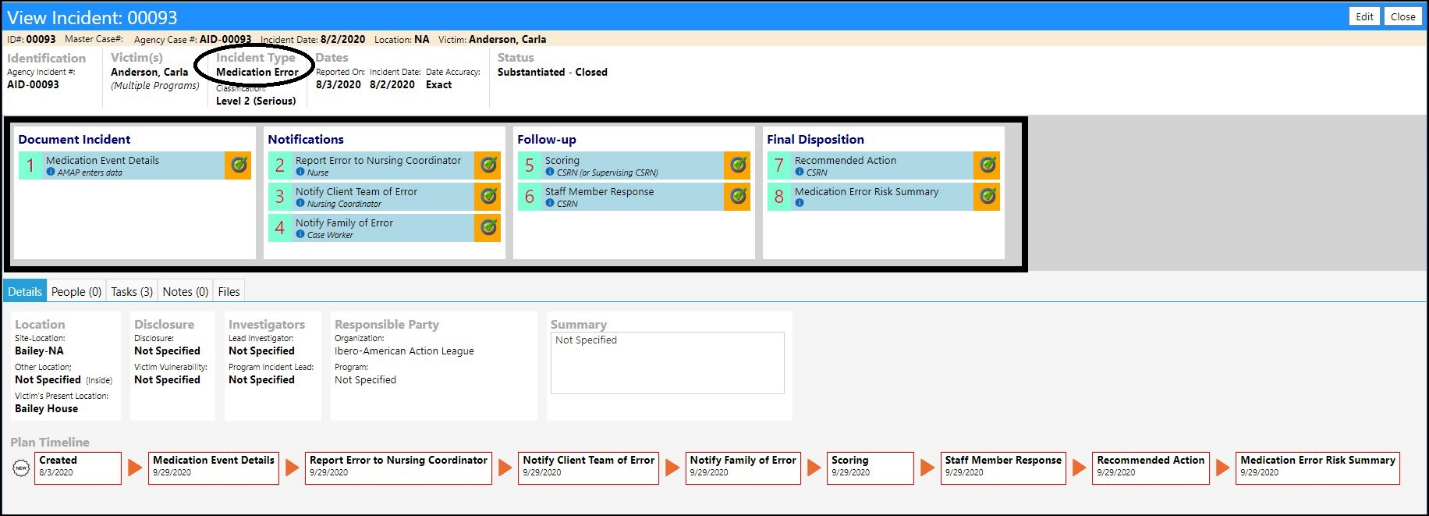
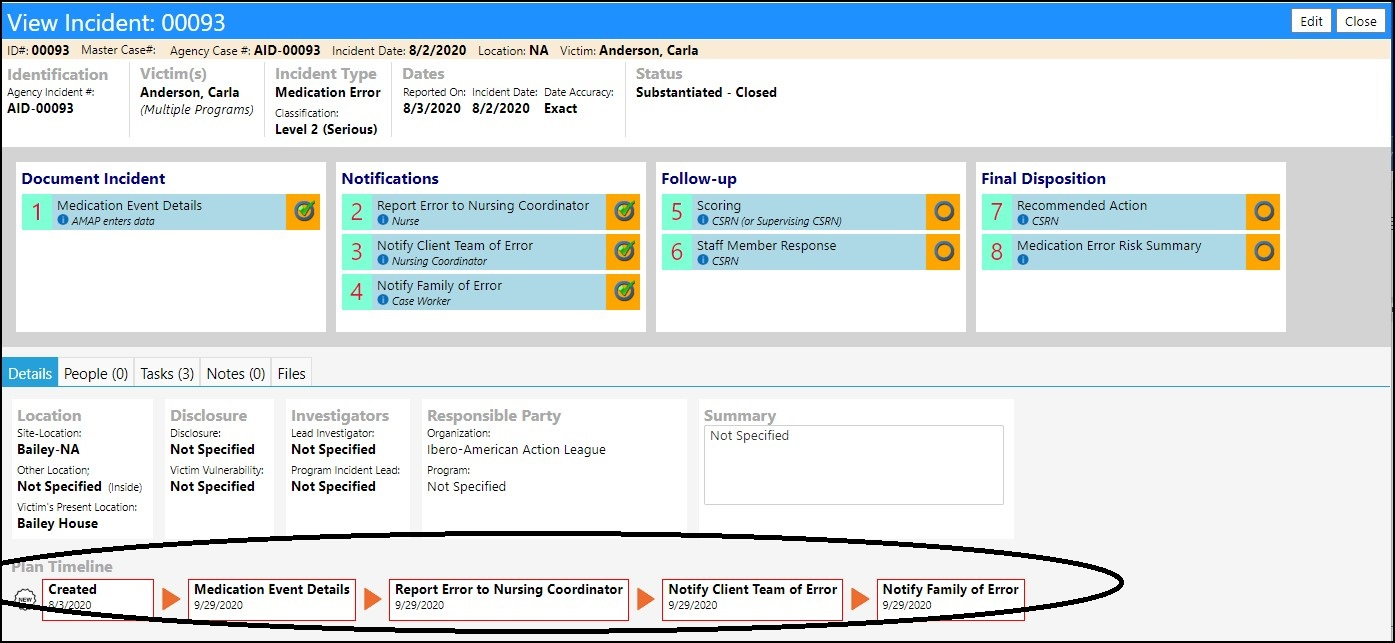
An example of a Medication Error workflow is shown below. It has 8 “action steps”, each of which has its own details and behaviors. The Account Roles authorized to update a step are configurable and, for some steps, the details of the step will vary depending on the person involved and the location of the incident.
The sections that follow are a high-level guide describing how to set-up and Incident process and how to log a new event.
Creating the Incident Plan
The process starts with creation of an Incident Plan.
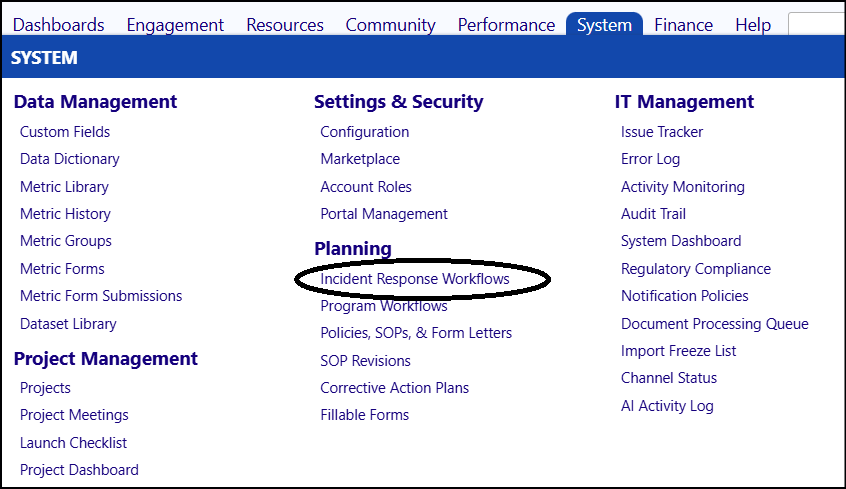
- From the Planning section of the System menu, find the menu item Incident Response Workflows (or search for it using the new menu search feature) and click that link.
A list of Incident Response Workflows will appear.
- Click Add New Plan to create a new workflow or click theID of the one of interest to bring up the edit form.
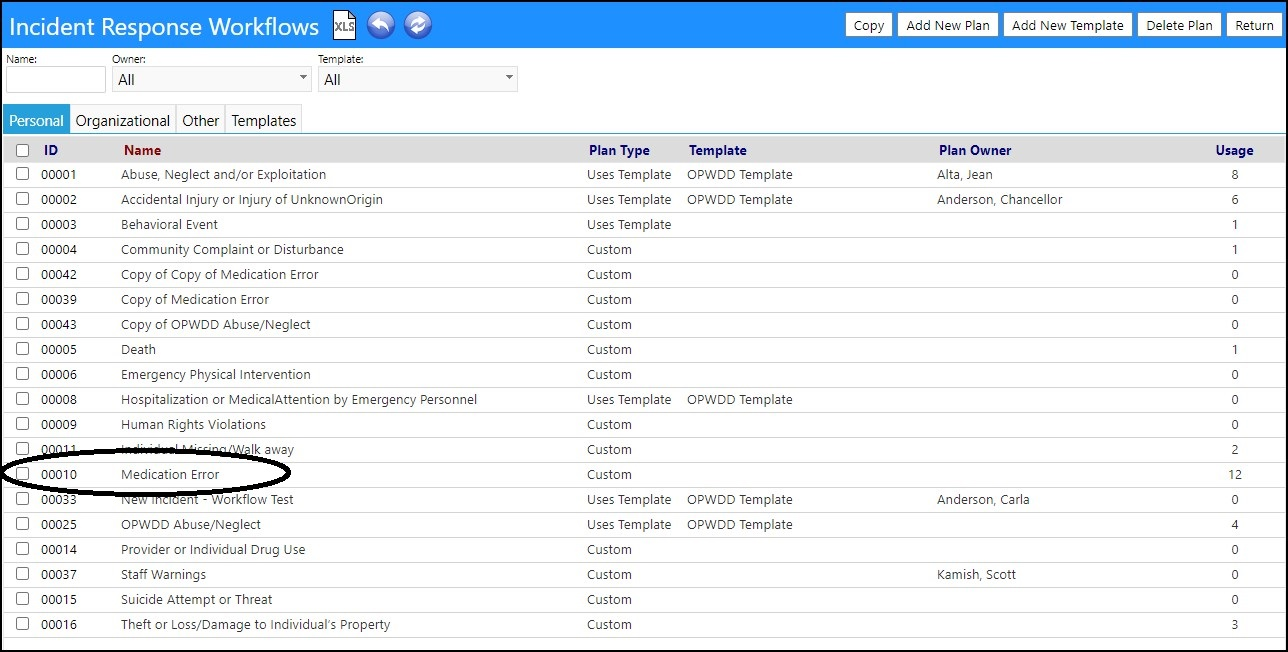
In this example, we will choose “Medication Error”
Editing the Workflow
The key elements of the workflow are Categories (they appear as columns on the workflow) and Actions (they appear as rows within the category).
- Add and delete ategories and add and deleteActions by clicking the '+' and '-' buttons as shown below.
- View the process visually by clicking the little “eyeball” icon to preview the flow.
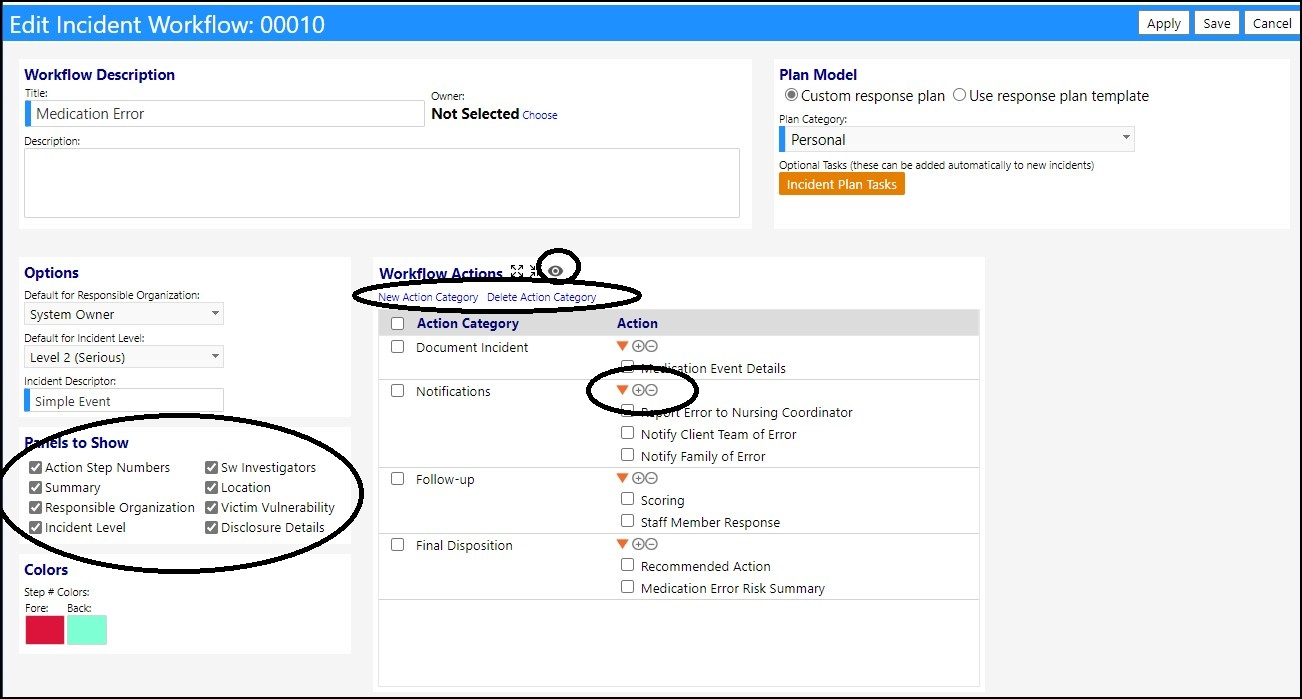
Also notice on the left of the setup screen are various options for turning portions of the incident entry form on or off.
- Select the appropriate Panels to Show depending on the incident type.
Editing a Category
- To rename or edit a category, click the category name.
Editing an Action
- To edit an action, click the action name.
An action edit form will appear.
- Enter an Action Name and choose anAction Type.
Depending upon the selected Type, different detail screens will appear during the workflow and different options will appear on the edit form.
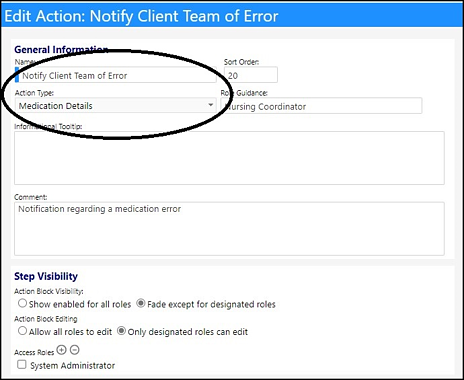
Informational Tooltip
This text will appear as an informational tooltip on the various action steps on the workflow screen (refer to “adding an incident” later in this document)
Row Guidance
This text will appear below the action name on the workflow screen (refer to “adding an incident” later in this document)
Key areas of the left side of the screen include:
Configuring Notifications
One of the optional Action Types is a notification type action. Within this action you can configure the system to list various people that need to be notified.
The list of people that get displayed can be a “hard coded” list that you configure, it can include external organizations, and it can include various people that are automatically added based upon the person involved with the incident (the “victim”) or the physical location where the incident occurred.
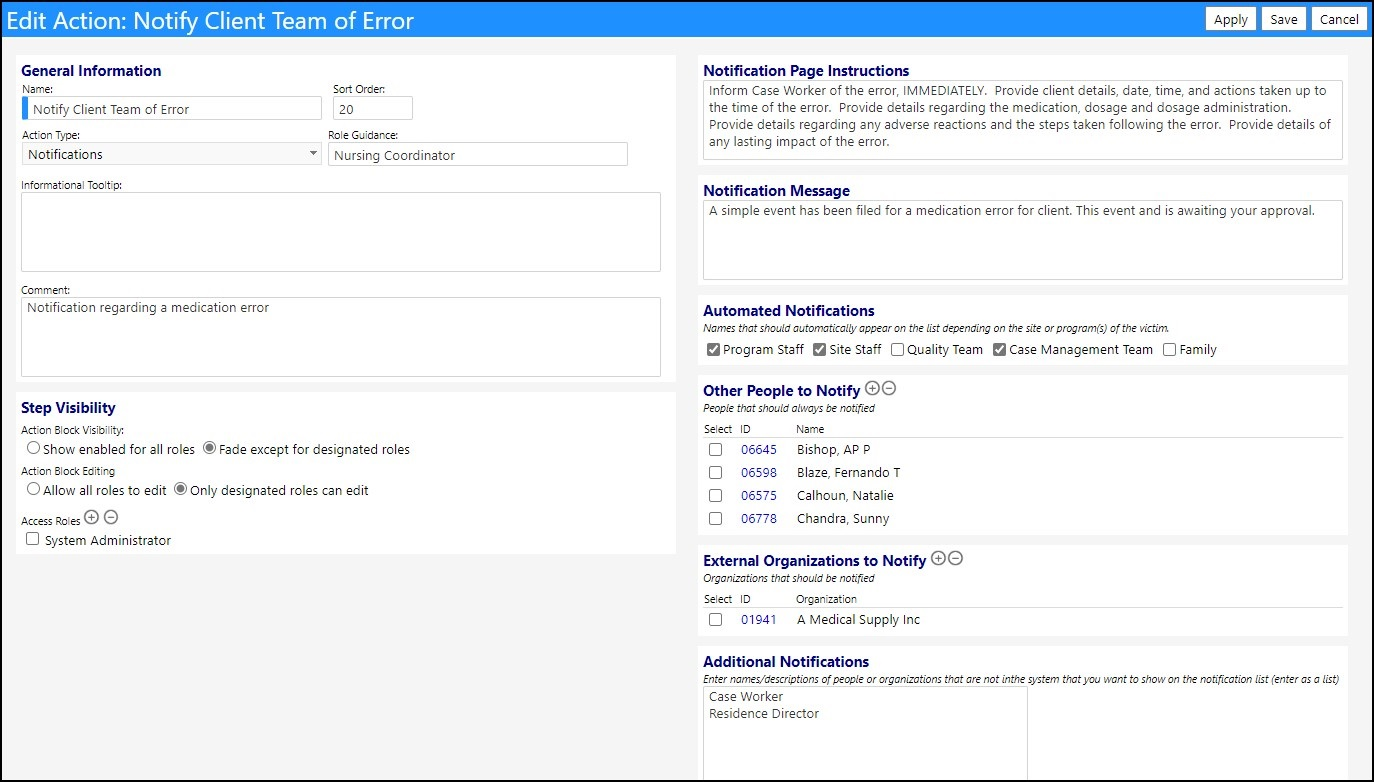
The key areas of notification setup are:
- Notification Page Instructions
These are the instructions that will appear for users when they are processing a simple event.
- Notification Message
This is the default message that will appear on notification emails. Users sending emails can always edit this content, but this text gives them a starting point.
- Other People to Notify
This is where you can add specific people that you wish to appear on the notification list for this event type and this action step.
- External Organizations to Notify
This is where you can add specific organizations that you wish to appear on the notification list for this event type and this action step.
- Automated Notifications Program Staff Checkbox
When this checkbox is checked, the notification screen will check the victim, and do a “lookup” of what programs they are in. Keeping in mind that one person may be in multiple programs. The system will then look at the staff associated with the program and any that are designated to be notified of incidents. Those people, checked for notification (on the program setup screen) will be added to the notification list.
- Automated Notifications Site Staff Checkbox
When this checkbox is checked, the notification screen will check the location where the incident occurred and do a “lookup” of staff associated with that location and identify any that are designated to be notified of incidents. Those people, checked for notification (on the location setup screen) will be added to the notification list.
- Automated Notifications Quality Team Checkbox
When this checkbox is checked, the notification screen will do a check of designated people that are part of the Quality team. As of Aug 5th, this feature is not yet fully implemented.
- Automated Notifications Care Management Team Checkbox
When this checkbox is checked, the notification screen will check the victim’s account record and identify if there is a care management team specified or not. If there is, the members of the care management team will be inspected and any identified for notification of events will be added to the incident notification list (refer to the staff team setup screen).
Note: for agencies using individual care managers rather than teams, simply create staff teams of one person. E.g. Name the Team “Mary” and add “Mary” as the staff member and mark her for notification.
- Automated Notifications Family Checkbox
When this checkbox is checked, the notification screen will check the victim’s account record and see if there are any family members defined. If there are, it will identify family members that have two conditions met:
-
HIPAA authorized
-
Primary care Giver
Any family members with those two settings will be added to the notification list
- Additional Notifications
There may be times when unnamed individuals must be routinely notified for a particular incident type. For example, if you needed to notify the agency legal representative after a medication error- but that person and that organization could vary, then you may choose to just add an ‘additional notification’ and set the name “Legal representative”. The additional notifications also appear on the notification list.
- Step Visibility
The step visibility settings are used to control which user roles can or cannot see a particular step.
Configuring other Step Types
Other incident action types cause different detail screens to appear. Most are far simpler than the notification screen.
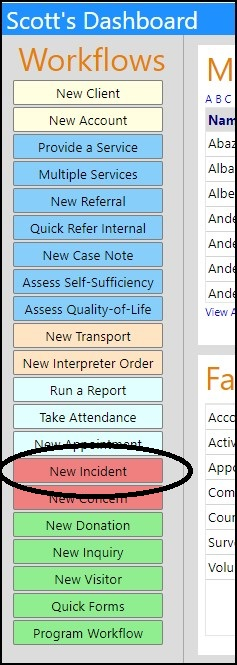
Entering an Incident
- To enter a new incident, click the New Incident Workflow shortcut icon on the home page or on the incident list.
- Once clicked, the system will prompt for an incident type as shown below, where we have selected “Medication Error.”
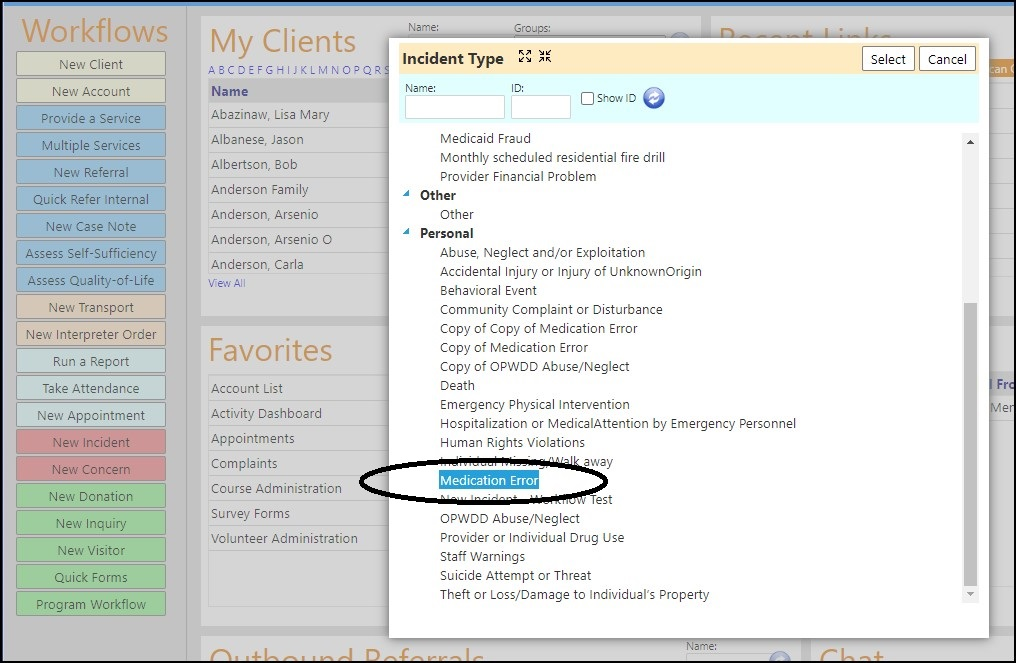
Once selected the incident screen appears – but with actions “grayed out”.
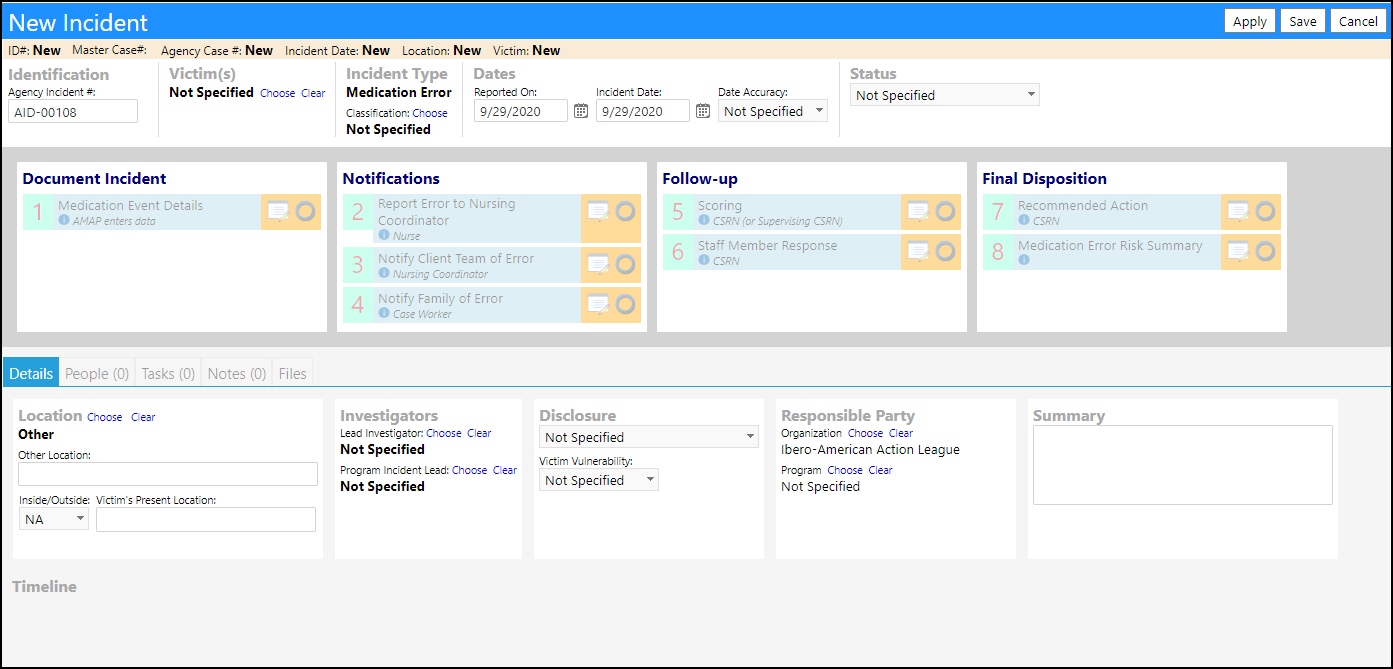
The form can be filled out in any of multiple ways, but the typical workflow is that the originator would proceed as follows:
- Identify the Victim(s) by clicking “Choose” next to the Victim name and selecting one or more persons.
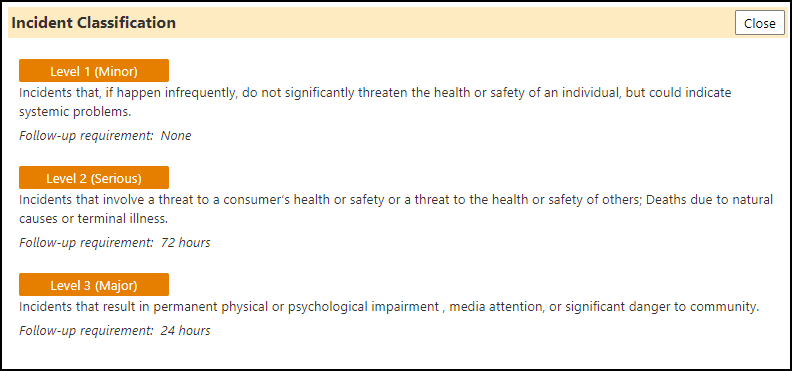
- Choose an incident Classification, if required (this is an optional entry based on the incident type), by selecting one of the 3 identified classifications.
- Choose an incident Location. This is an optional entry, but certain notifications can be based on location – so setting that early is a good practice.
- Enter a Master Incident #, if required (this is an optional entry based on incident type. It can also be set to autogenerate as shown rather than be a manual entry).
- Enter the Dates of the incident.
- Click Apply to create the record and activate the workflow.
Some workflows are configured with optional tasks (advance topic). When optional tasks are present, the following popup appears:
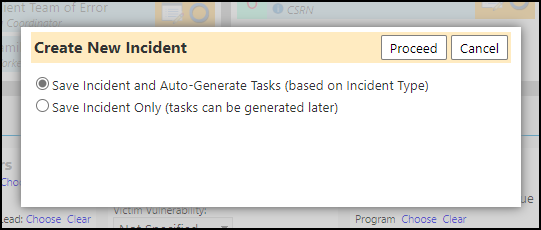
Typically, the user will create all tasks. For testing purposes, you may want to skip that step and create tasks later.
If there are no tasks, or upon the user clicking Proceed on the task popup, the workflow is activated.
With the workflow activated, the action buttons enable. Note that some may remain gray depending on the role of the user. As administrator, for example, all actions appear as enabled.
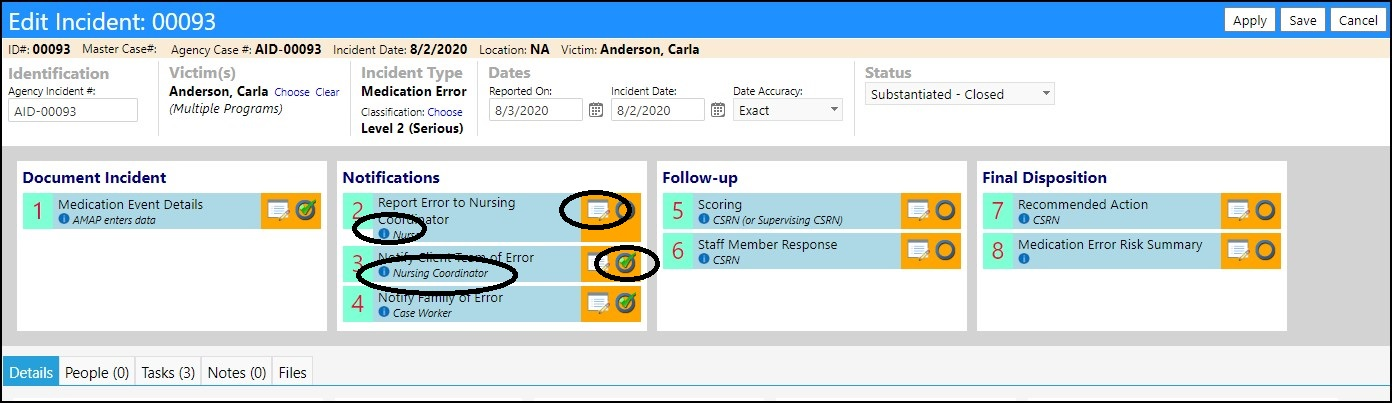
Certain screen elements to look for are as follows:
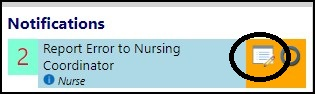
- Blue bubble
This displays a tooltip with more details about the step. The text comes from the action setup screen “informational tooltip”.
- Edit icon
Click the edit icon to call up the detailed form associated with the action step.
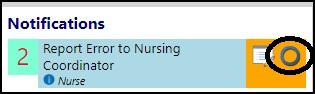
- Checkbox icon
Click the checkbox icon to indicate that the step is completed. The incident timeline on the bottom of the page will update.
- Role description
A user editable description of role will appear in each box under the step name. (refer to action setup).
- Users should progressively click the Edit link to enter the needed data.
- Click the checkbox when done.
Clicking the Notification type, action step(s)
When a notification step is clicked, a screen appears with the system generated list of people to notify.
In the medication error example, we get the following list:
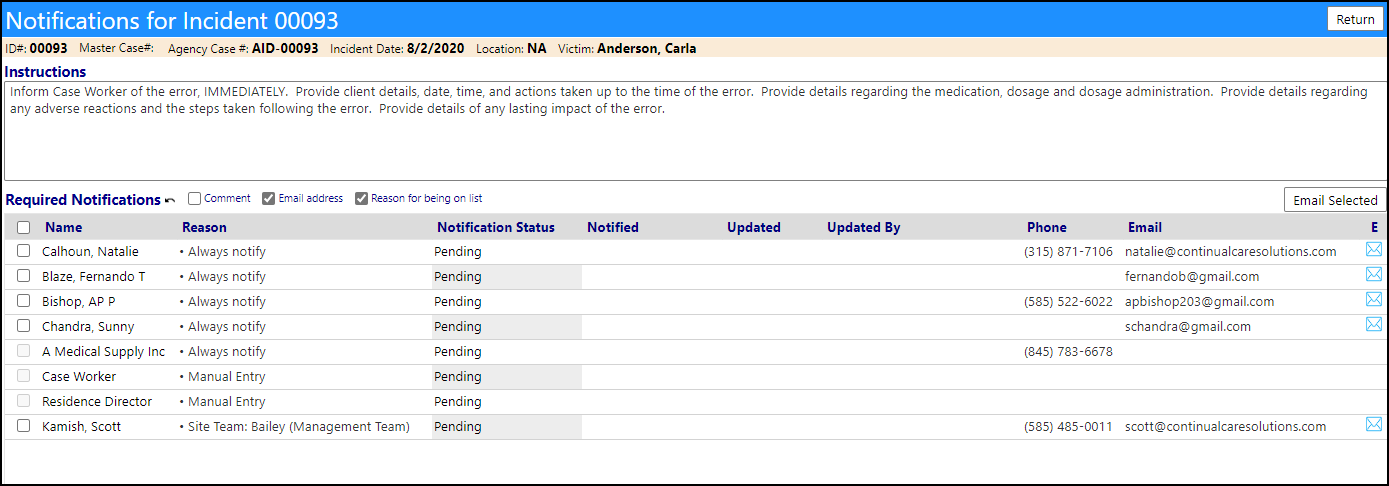
Note that a column indicates the reason a person is on the list. In some cases, there is one reason (e.g. They were on the list of people to always notify), but in other cases, they are on the list for 2 or more reasons, All the reasons are shown,
From here you can send emails or call them.
- Update their notification status by clicking the current Notification Status (e.g. ‘pending”).
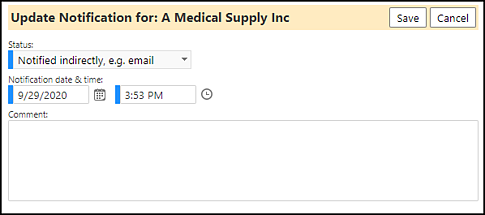
- Click Save to capture your entries.
NOTE: As you complete each of the Action steps, a Timeline will be established along the bottom of the incident. This timeline will be useful when tracking the time elapsed in between different actions.
Completing an Incident
- When all steps are completed, select the incident Status (upper right) from the drop-down menu.
- Save the Incident.
Viewing a summary of all Incidents
- To view a summary of all incidents, click on Incidents in the Compliance section of the Performance menu.
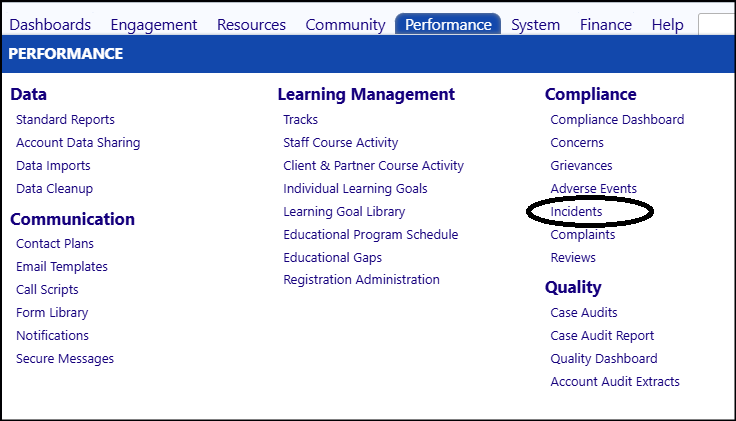
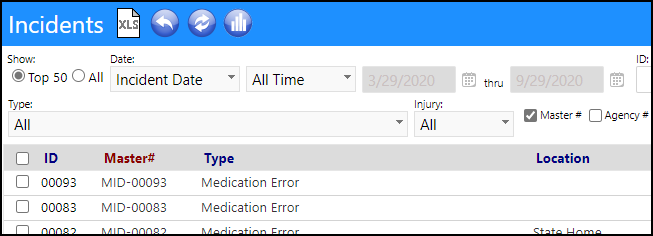
A filterable list of all incidents will appear.
- View the incident by clicking on the ID corresponding to the appropriate incident.
Confidential