How do I configure the Intake form
This article will provide you the configuration locations you can go to within imPowr to configure the Intake form.
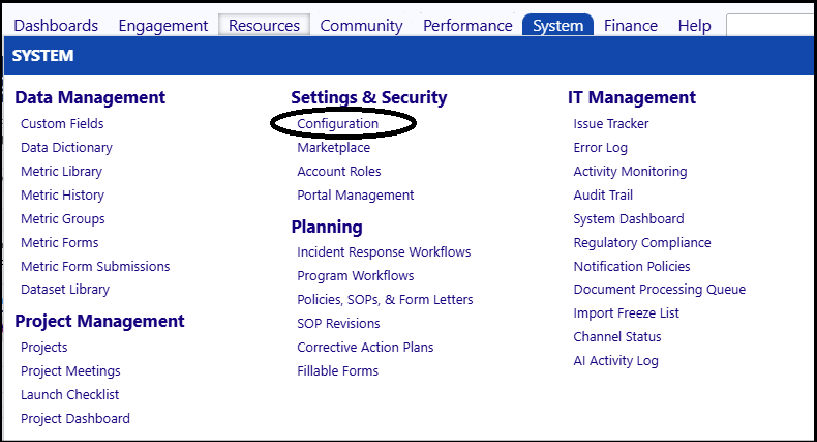
The configuration for the Intake form may be found in the Configuration section of imPowr. You can access Configuration from the Settings & Security menu of the System module:
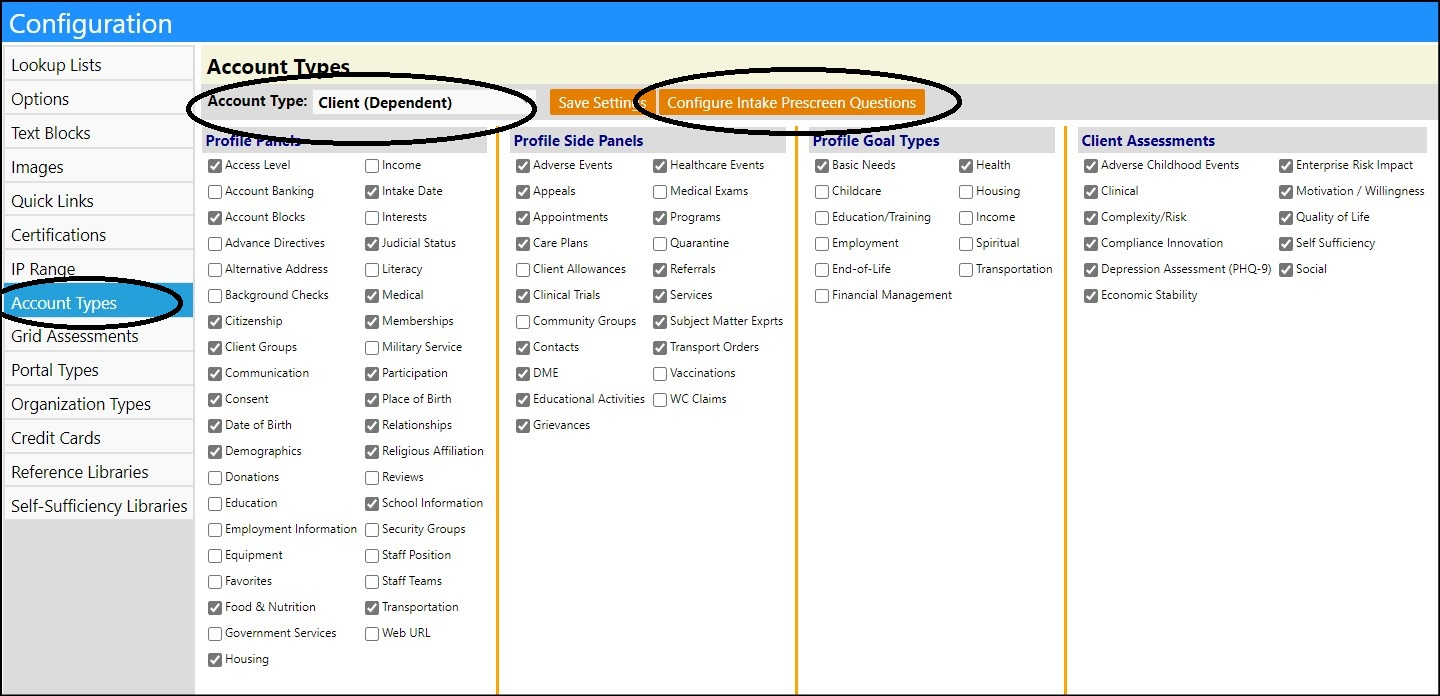
In Configuration, you can configure the Prescreen Questions by...
- Click on Account Type.
- Select the Account Type from the dropdown list of Account Types.
- Click Configure Intake Prescreen Questions.
-
Enter the Instructions for the Intake form.
-
Enter your Prescreen Questions.
-
Click on + to add questions; check the box to the left of the question and click on- to delete it.

-
NOTE: If the Log Count displays 1 or more, you cannot delete the question, because it indicates it was responded to 1 or more times.
-
Enter the sort order for the questions - the higher numbered questions will be displayed in the bottom of the list of questions.
-
Select the Entry Type of answer your question is looking for.
-
Select Yes/No for a Yes or No answer (these will appear as radio buttons).
- Select List for a drop down list from which an answer is selected.
-
Create the drop down list by entering the choices, separated by a "|" (example: red|yellow|green).
-
-
NOTE: The "|" symbol is found on your keyboard below the backspace key.
- Select Text for a free Text answer.
- Select Temperature if you wish for someone to enter a temperature into the form.
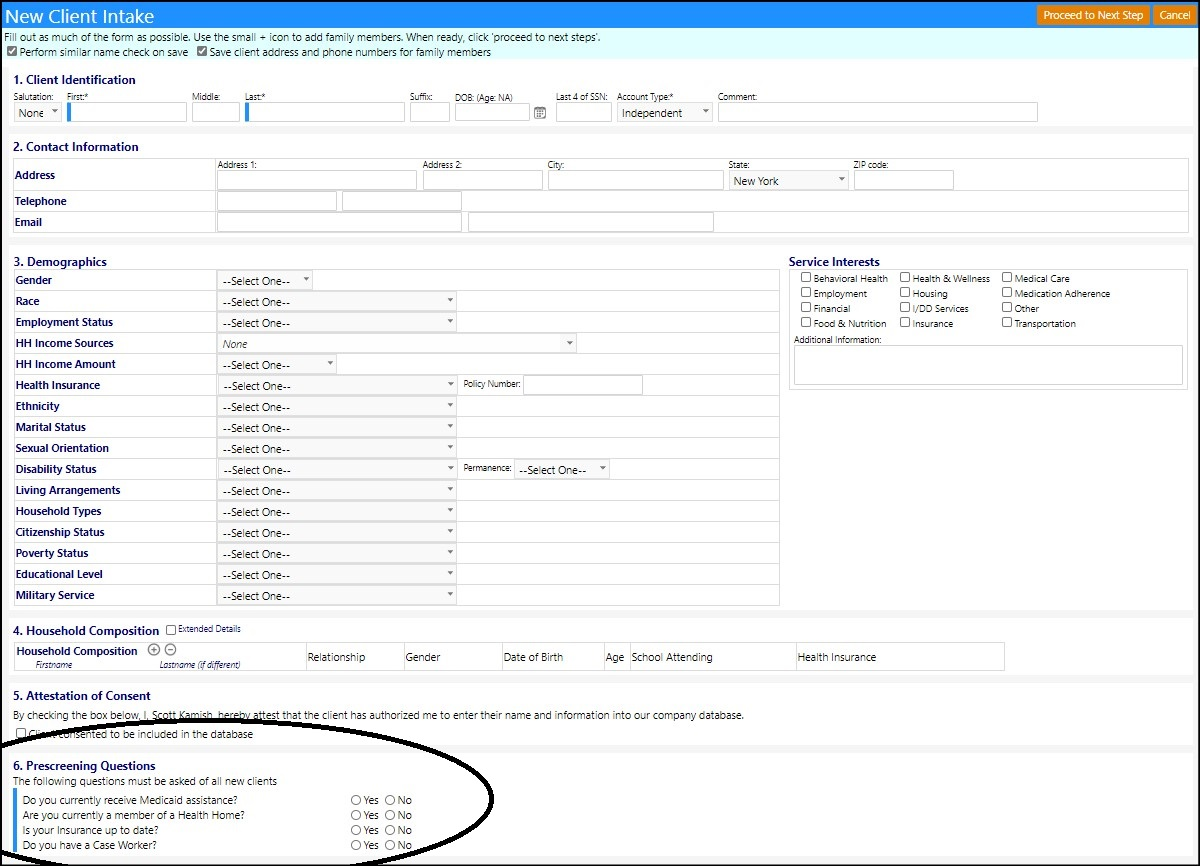
- Enter the Prescreening Rules.
The Prescreening Rules are used to identify possibly programs for which the person being evaluated for possible intake can be referred to.
For example, in the example below, if the person provided a Yes for question 1 and a Yes for question 2, maybe they would be referred to program Medical. In that case, we would indicate a [Q1] and [Q2] on the row for Medical. If the person ends up answering No for question 2, they would not be referred to Medical. But, as seen in the example above, if that were to have occurred, and if they answered Yes to question 3, they would be referred to Household.
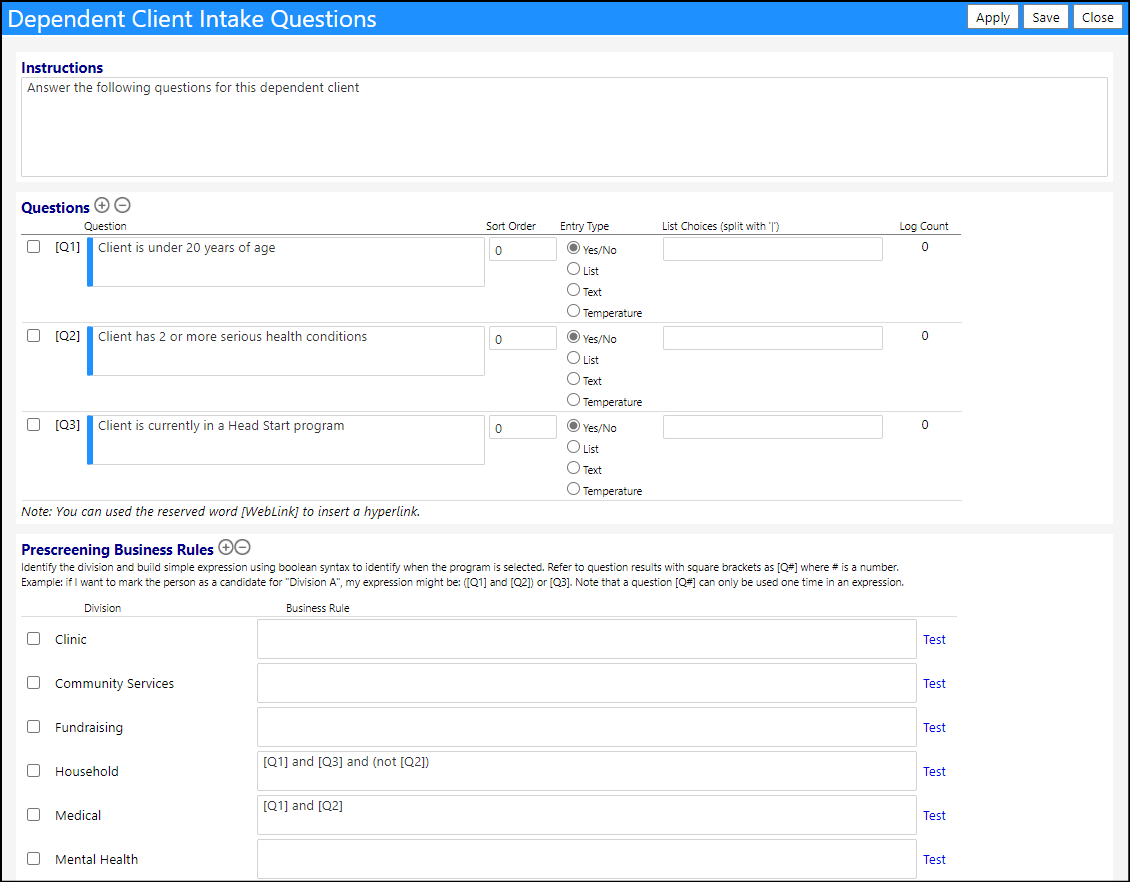
- Test to see if the way you entered the logic works correctly, by clicking Test when you are done with each of your entries.
- Click Save to save your entries.
- Click Save Settings to save all of your Account Type changes.

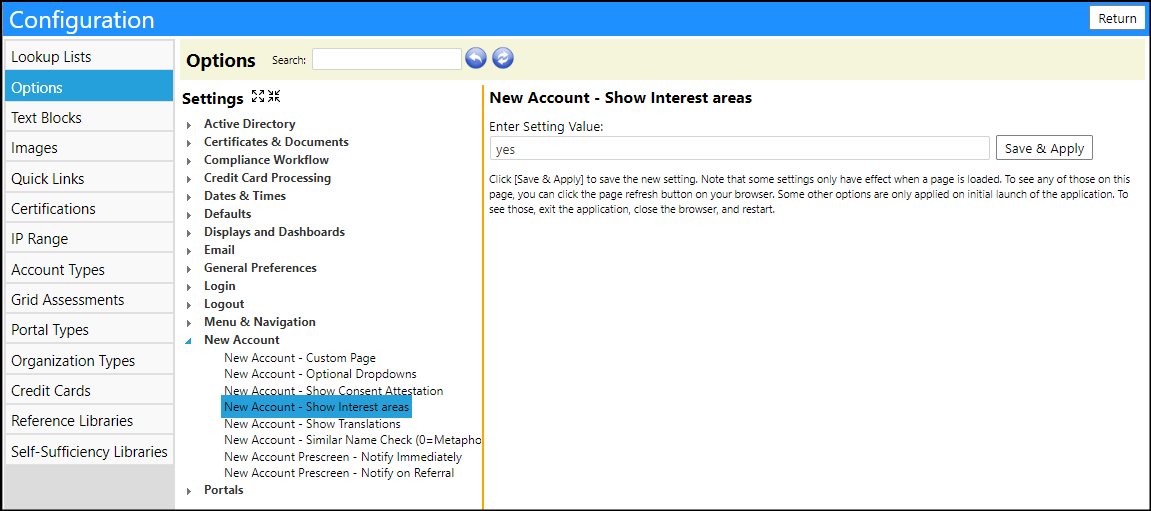
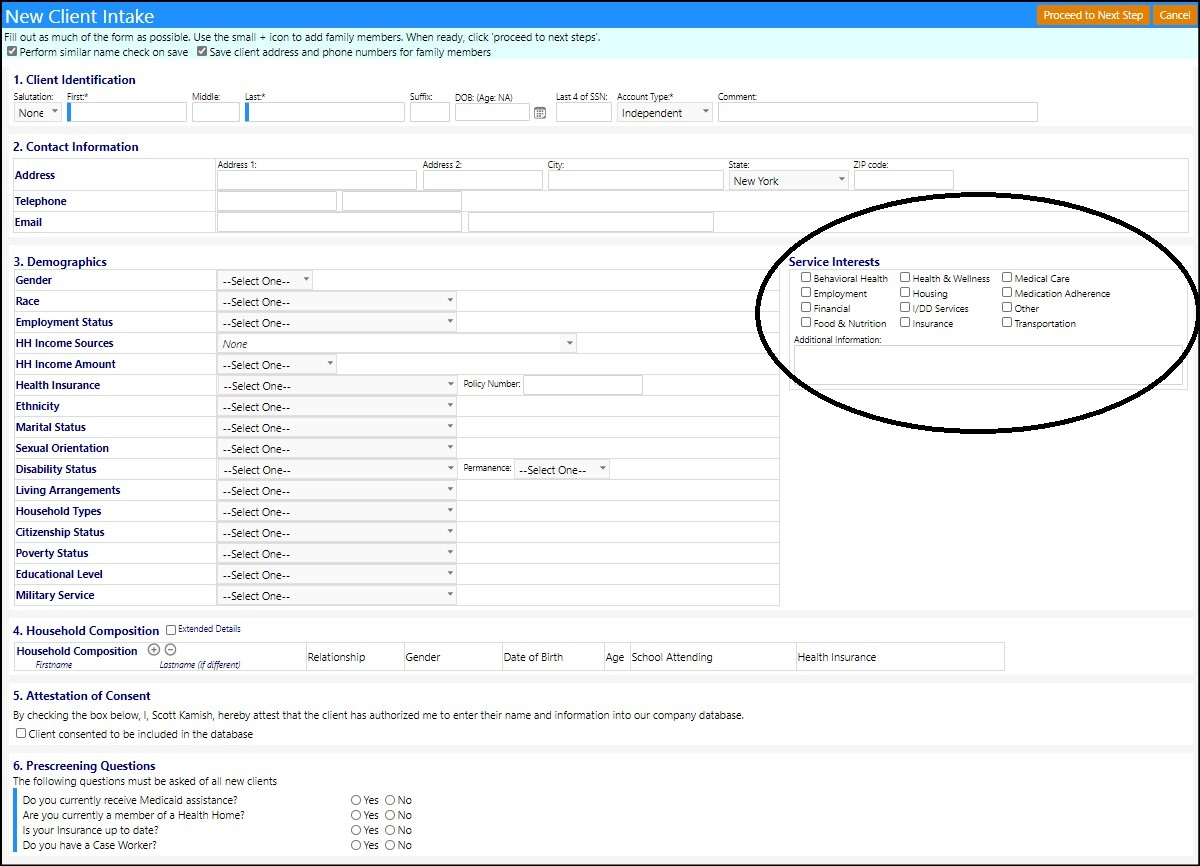
The Interest panel in the Intake form is optional.
- Click on Options to access the configuration for that panel.
- Select New Account.
- Click on New Account - Show Interest Areas.
- Enter yes to display the panel orno to not display it.
- Click Save & Apply to save your settings.
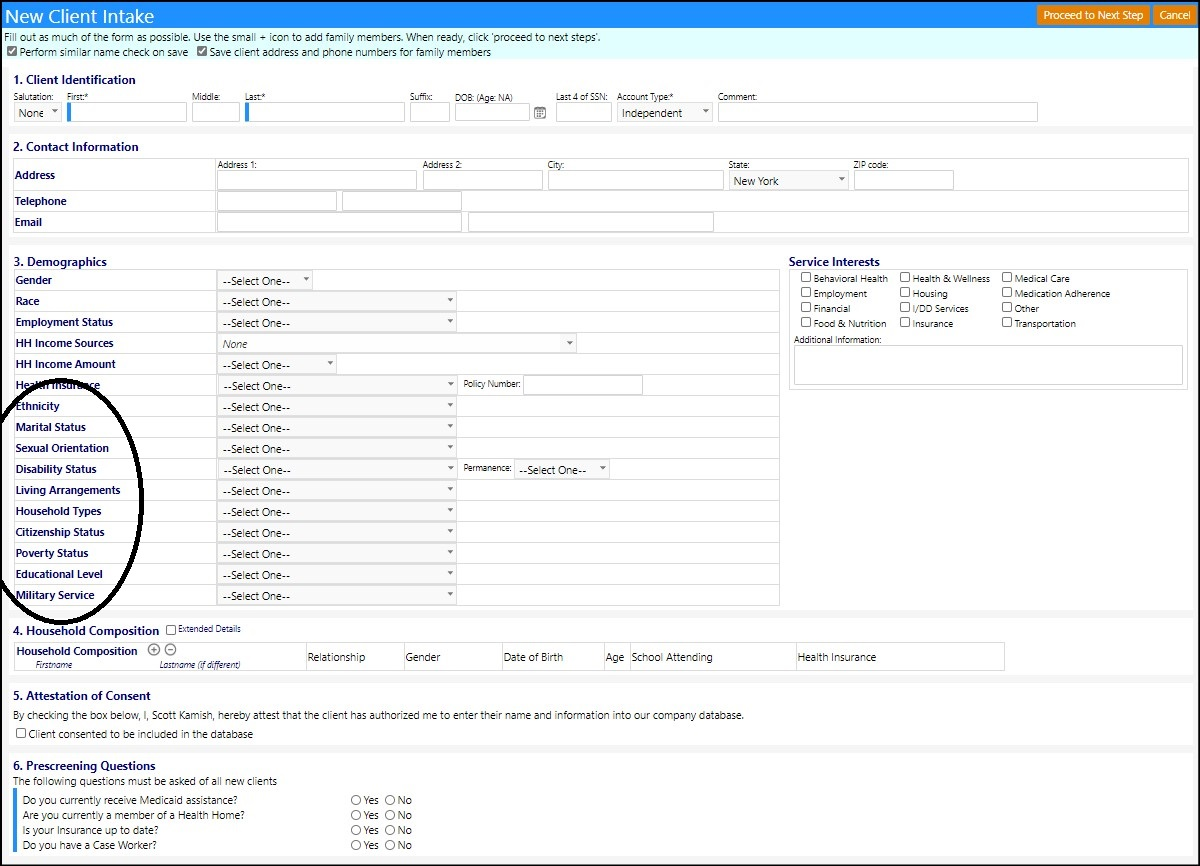
The display in section 3 of the form is configurable. The section always displays Gender, Race, Employment Status, Household Income Sources, Household Income, and Health Insurance, but can also optionally display fields for Ethnicity, Marital Status, Sexual Orientation, Disability Status, Living Arrangements, Household Type, Citizen Status, Poverty Status, Educational Level, and Military Service.
- Click on Options to access the configuration for that panel.
- Select New Account.
- Click on New Account - Optional Dropdowns.
- Enter the optional fields you would like to display by entering them into the Values, each separated by a comma:
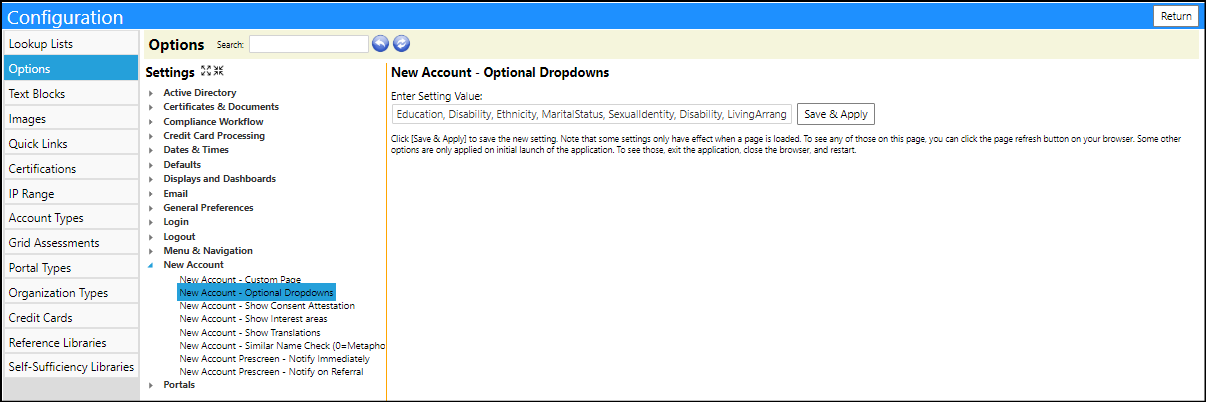
Click Save & Apply to save your settings.
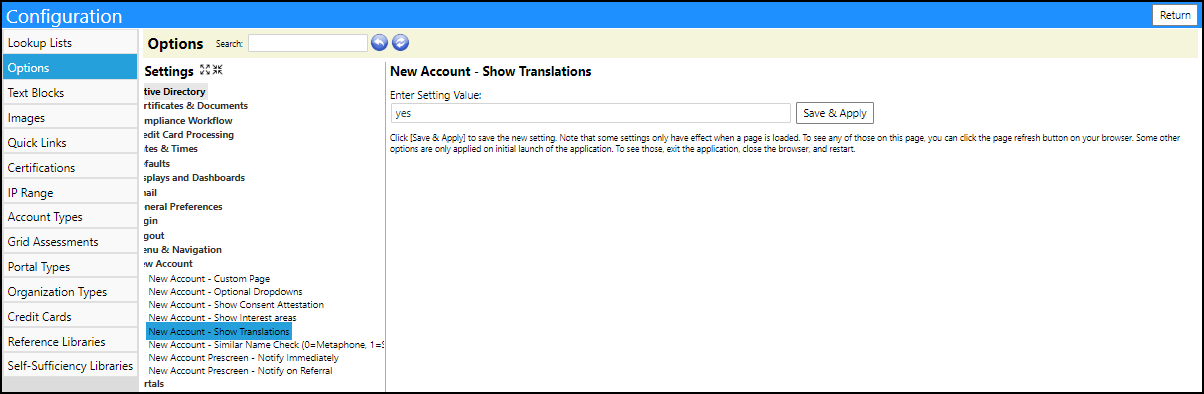
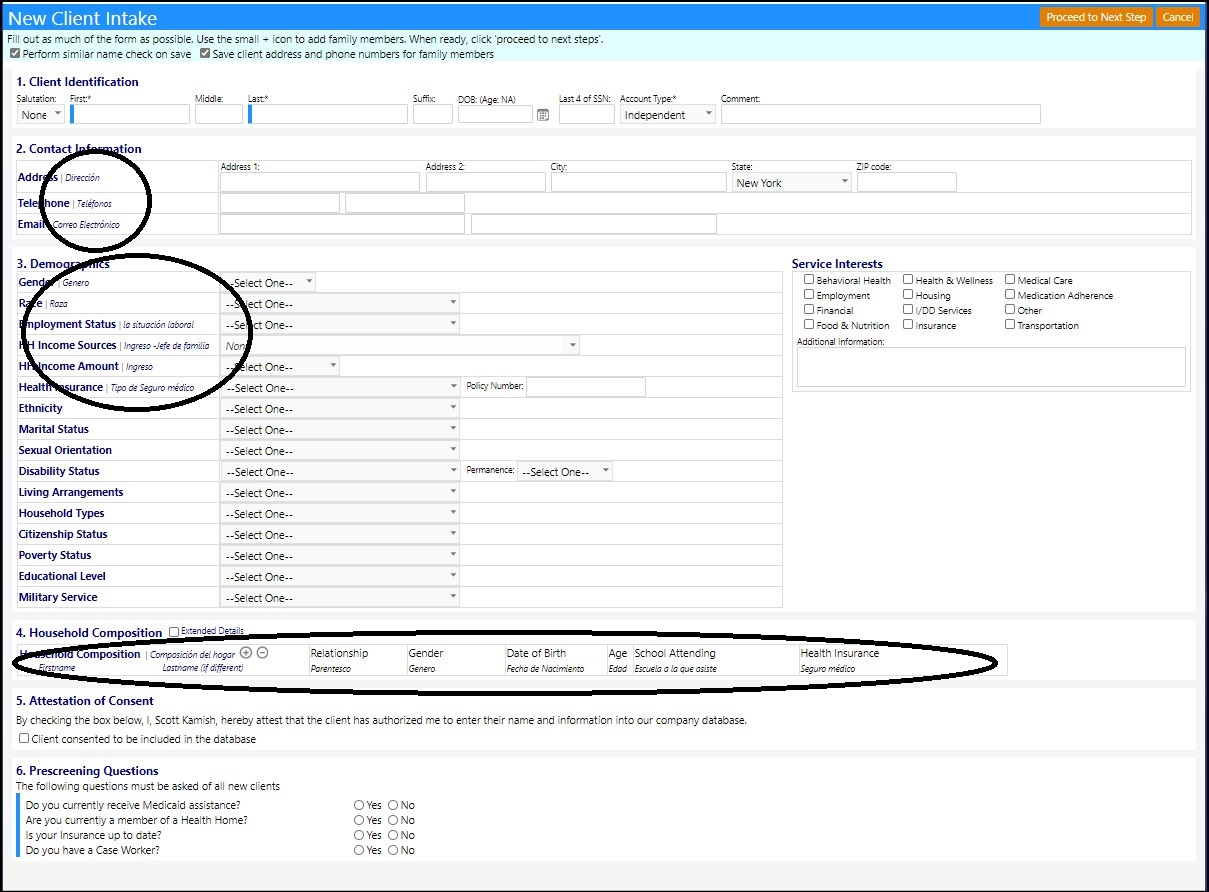
The Translation to Spanish in the Intake form is optional. This applies to selected fields only.
- Click on Options to access the configuration for that panel.
- Select New Account.
- Click on New Account - Show Translations.
- Enter yes to display the translation orno to not display it.
- Click Save & Apply to save your settings.
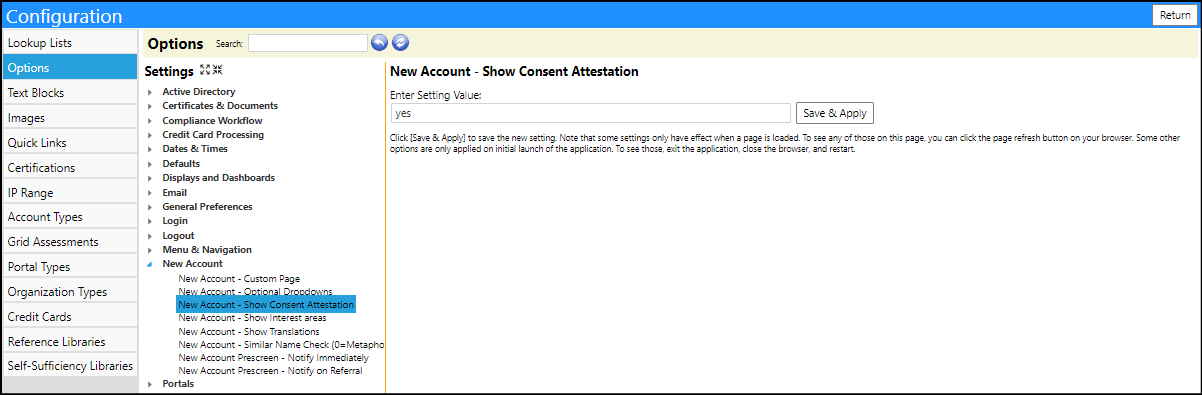
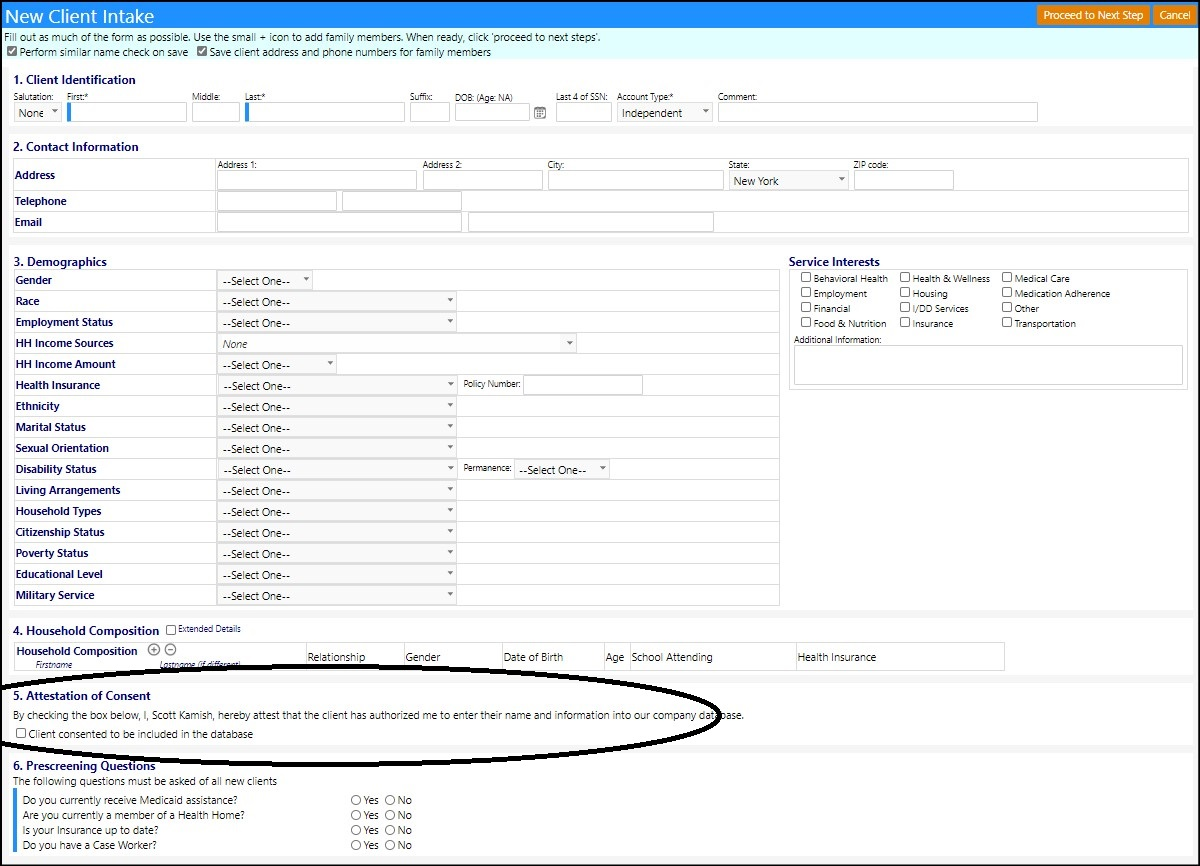
The Attestation of Consent panel in the Intake form is optional.
- Click on Options to access the configuration for that panel.
- Select New Account.
- Click on New Account - Show Consent Attestation.
- Enter yes to display the translation orno to not display it.
- Click Save & Apply to save your settings.