How do I use general ledgers
This article will tell you how to add and delete general ledgers, as well as notes and files.
Adding General Ledgers: * Click on New General Ledger. * Enter the General Ledger Owner. * Click on Proceed.
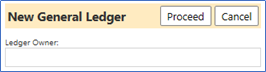
Example:

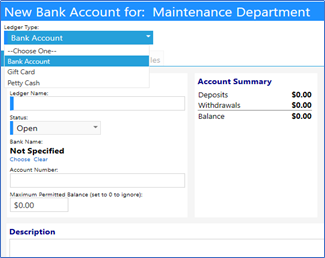
Similar to the Account Ledger, enter the Select the Ledger Type from the drop down list:
- Bank Account
- Gift Card
- Petty Cash
-
Enter the Ledger Name.
-
Enter the Status:
-
Closed
- Open
- Suspended
-
-
Enter the Bank Name by clicking on Choose and selecting a name from the Organization list.
- Enter the Account Number.
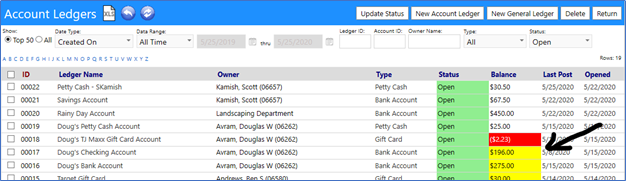
- Enter the Maximum Permitted Balance (set this value to 0, if you wish to ignore it. Otherwise, set it to a value so that the Balance background changes color (to Yellow) to alert you if there is too much money in the Account).
- Click on Apply.
Entering General Ledger Transactions:
Enter all General Ledger Transactions similar to way you did it for the Account Ledgers.
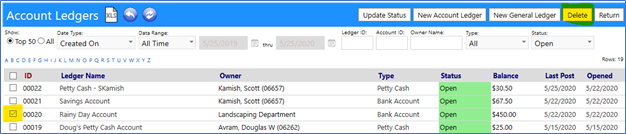
Deleting Ledgers:
Delete Account Ledgers by selecting the entry via the checkbox to the left of the Ledger ID, and clicking on theDelete button:
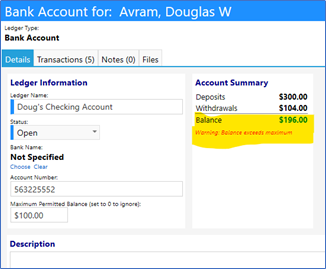
Setting the Maximum Permitted Balance:

When you set the Maximum Permitted Balance, and the balance on the Account exceeds that entered amount, a message will appear in the details screen indicating “Warning: Balance exceeds maximum” AND the balance listed in the Account Ledger list will display in Yellow:
Setting the Maximum Permitted Balance is optional. If you do not care to set this value, please ensure the Maximum Permitted Balance is $0.00.
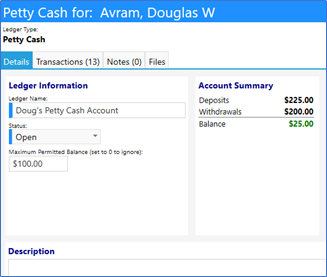
Note: Even though the Maximum Permitted Balance was exceeded, any time the Account balance is greater than $0.00, the Account Summary displays the balance in Green. This is true any time the balance is greater than $0.00:
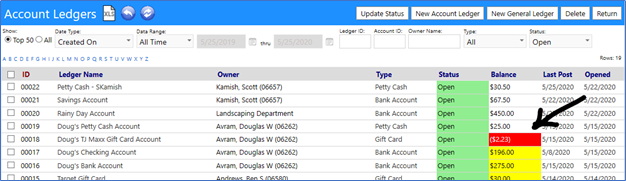
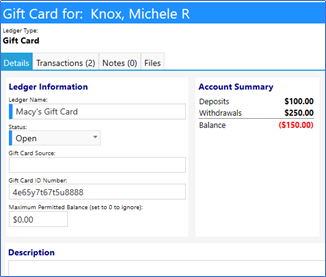
Any time the balance of the Account falls below $0.00, both the Account Summary and theAccount Ledgers list will display the balance in Red:
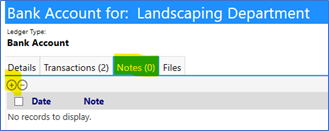
Adding Notes:
You can add Notes related to your Ledger by clicking on the Notes tab and clicking on the “+” button:
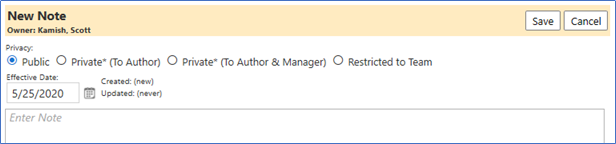
When you do this, a Note window will open:
- Select your Privacy level for the note.
- Set the Effective Date of the entry.
- Enter your
- Click on Save.
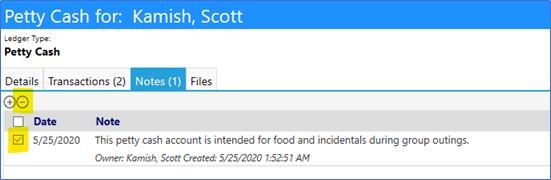
Deleting Notes:
Delete Notes by selecting the entry via the checkbox to the left of the Note ID, and clicking on the “-“ button:
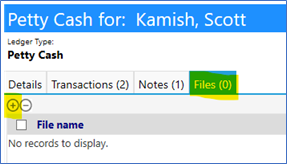
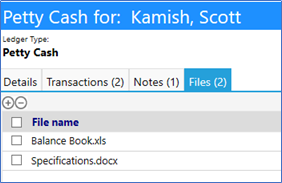
Attaching Files:
You can attach a file to this Account (e.g. attach copies of statements, receipts, or other supporting documents, etc.) by going to the Files tab and clicking on the “+” button:
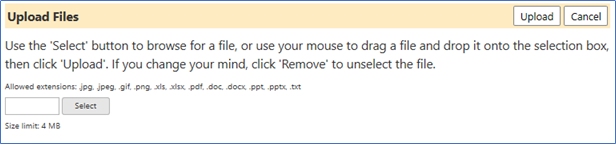
Select your files from your computer andUpload as many as needed:

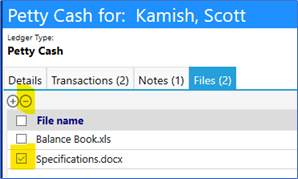
Deleting Files:
Delete Files by selecting the entry via the checkbox to the left of the Filee ID, and clicking on the “-“ button:
NOTE: Account Ledgers are associated with accounts set up in the system, whereas General Ledgers are not. This is important, because if you are trying to restrict who has visibility to a client’s ledger, it must be associated with a Client Account and must be an Account Ledger and not a General Ledger. (You can tell if a ledger is associated with an account in the system if you see the account number adjacent to the clients name in the Owner column. Conversely, if it is not associated with an account there will be no account number after the Client’s name.)
