How can I add a relationship such as children to an existing Client
This article will explain how you can create client relationships in imPowr.
If you already have an existing client account in the system , there are 2 ways to create a relationship with another account (such as a Child (Dependent) account).
For the purposes of this article, we will assume your Account Role provides you with sufficient rights to view, add, and edit accounts. If this is not the case, you will need to work with your imPowr System Administrator to get this access before you will be able to create account relationships.
While either way can be used to create the relationship between accounts, there are some key differences between the methods. The first method only creates a relationship between the accounts. Typically, the accounts are already created in the system, but as part of creating the relationship, a new account can also be created during the process. Doing it this way establishes the relationships between the accounts, but does not create a Client (Family) account in the system. This way of creating relationships is good when you want to identify a client's support team, consisting of family members (spouses, partners, parents, grandparents, children, cousins, nieces/nephews, aunts/uncles, siblings), friends, and others.
The second way requires more steps to complete, and works similarly as method 1 in regards to creating relationships, but will create a Client (Family) account for you, along with the family account relationship. **The second method does not accommodate relationships with non-family members - it can only establish family member relationships. ** With either method, you can utilize existing accounts or create new accounts as part of the process.
NOTE: Even though the first method does not create a Client (Family) account, you can always do that manually.
The following are the 2 methods to create client relationships...
Method 1: Create the relationship via the Client Profile
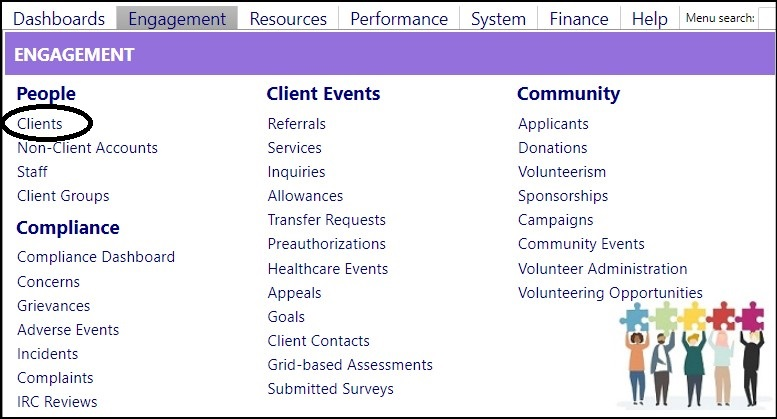
Access your primary Client Account via the People section of the Engagement menu.

Locate your client in the client list and click on their Client ID.
Click Edit.
Go to the General Information tab and locate the Relationships panel.
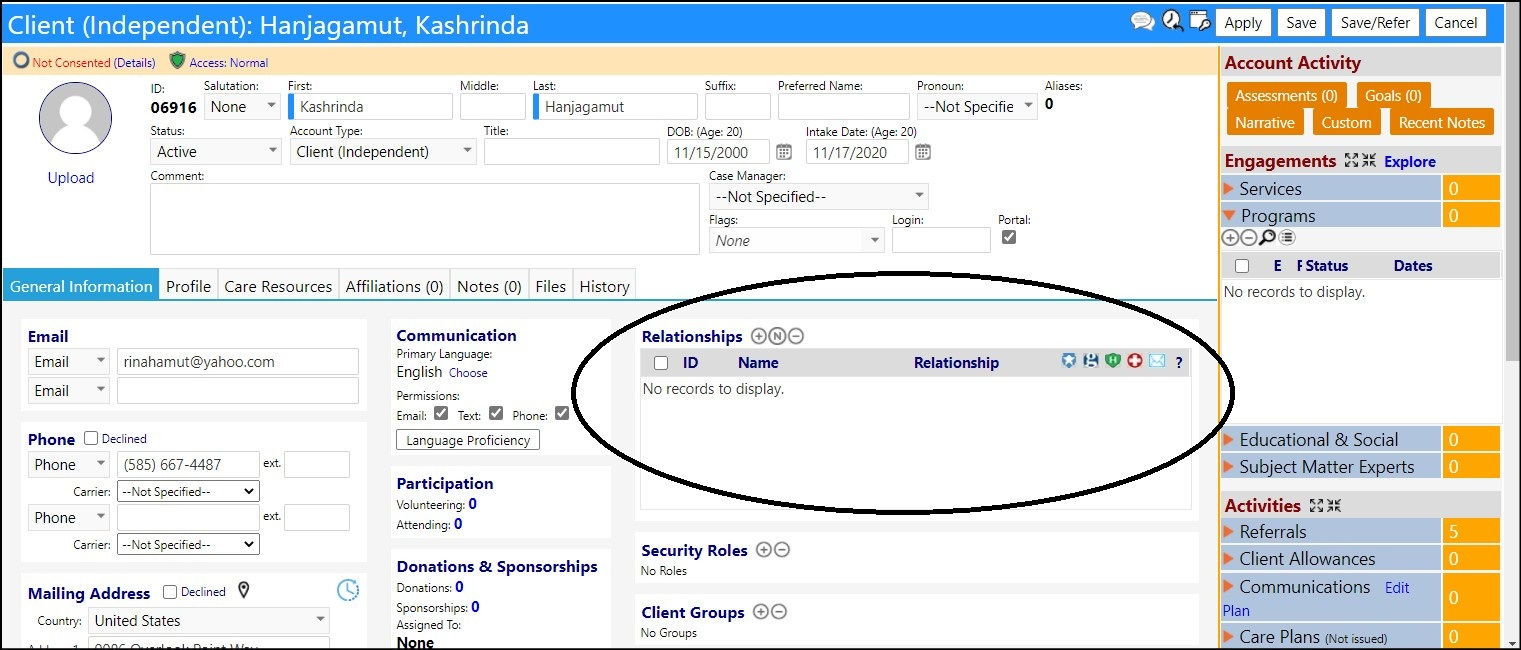
Working with Existing Accounts
Click the '+' to add an Existing Account to the relationship.Choose the Account from the list of accounts by checking the box to the left of the account name.
Click Save.
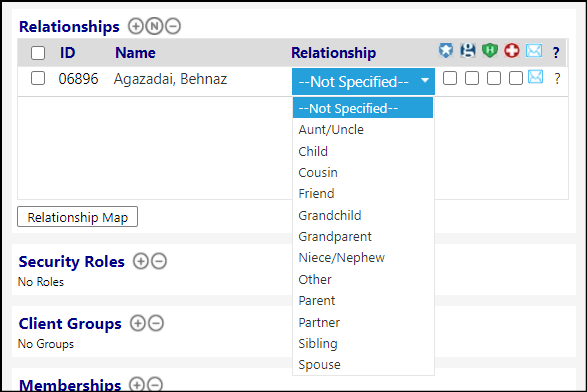
The name will be added to your relationships.

Select the Relationship from the drop-down list.
Click Save to save your account changes.
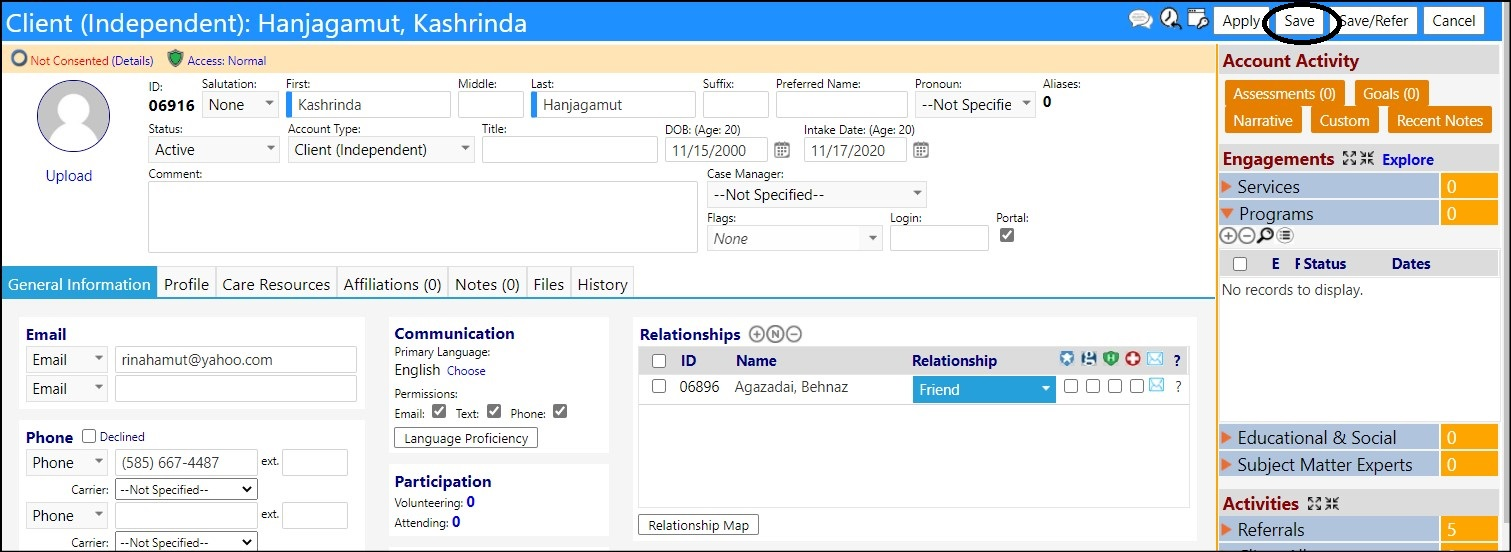
The relationship will now be created for both accounts - both the one you entered it in as well as in the one you selected.
Working with Non-Existing Accounts
Click the 'N' to add a New Account to the relationship.Choose the Type of Account you want to create.
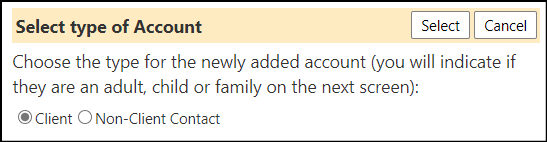
Click Select.
A new window will open for you to create your account with.
Select the Account Type from the drop-down list. This will cause a New Account input form to open.
For a Client Account...
Select the Client Account Type you wish to create from the drop-down list. Choose between Client (Family), Client (Dependent), and Client (Independent).
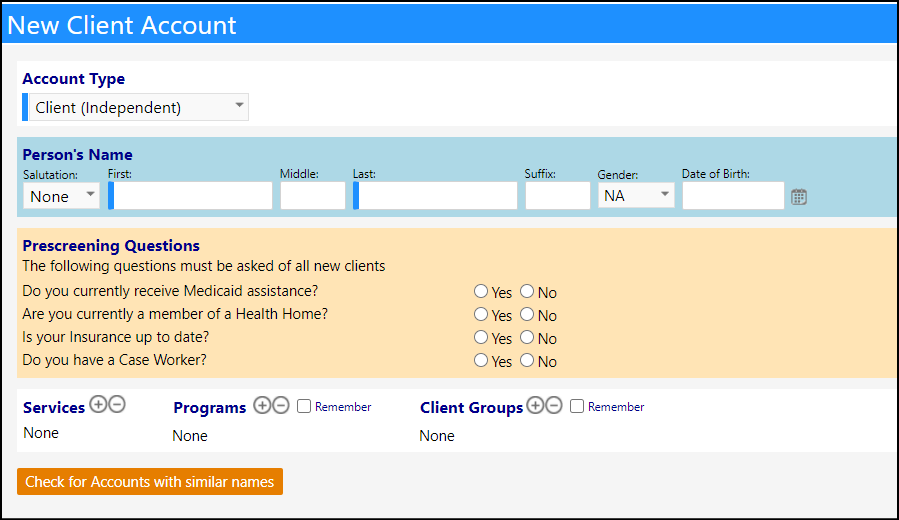
For a Client (Dependent) or Client (Independent) Account Type...
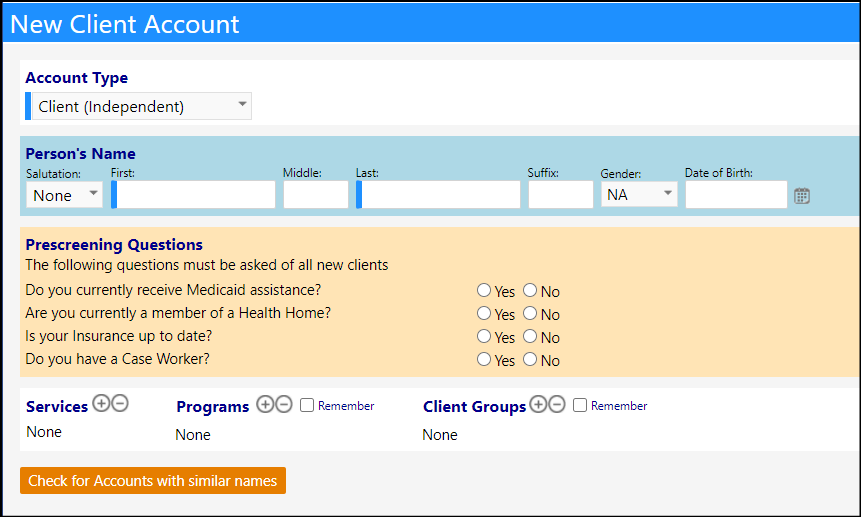
NOTE:Your list of Prescreening Questions may be different than those displayed above. They may also be different between Client (Dependent) and Client (Independent) accounts, depending on the questions selected by your particular organization.
Enter the individual's First and Last Name,Gender, andDate of Birth.
Answer the prescreening questions (be sure to select Client is under 20 years of age, if that is the situation).
Optionally, select any Services,Programs, orClient groups you would like to immediately add them to by clicking on the '+' and selecting those from the list which will display.
For a Client (Family) Account Type...
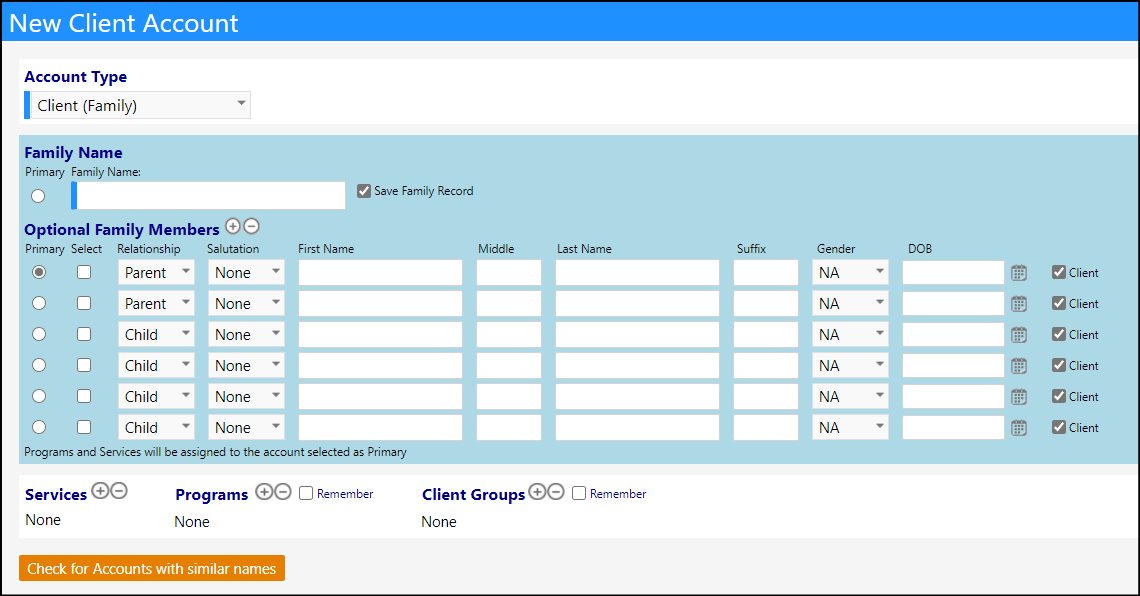
Enter the Family Name that you wish the account to be created with.
Typically, the format of the Family Name is the client's last name followed by a comma and their first name. It is is done this way to differentiate client families which might have the same last name.
Entering Optional Family Members.
Enter the family member's relationship to the client by selecting the Relationship from the drop-down list.
Enter the individual's First and Last Name,Gender, andDate of Birth.
Check the box to the right of their name if you wish for them to be created as a Client.
If you do not check this box, they will be created as a Non-Client (i.e., Individual Account).
Click the '+' located to the right of the Optional Family Members if you wish to add additional family members. Conversely, select a family member and click the '-' if you wish to remove them from the list.
In the Relationships panel, set the relationship types and fill in any other missing information you want. Be sure to click Apply after adding things and going to a different tab.
Click Save to save all of the changes made to your new account. Feel free to add other family members to the relationship by clicking on the '+' if they are an existing account or on the 'N' if they do not currently exist in imPowr. (Note, after adding the relationship, when you click save, you might be brought to that primary account - if you are, just keep clicking save until the windows close.
You are now done and your client dependent, and client relationship are now all created in imPowr (but no Client family account).
Method 2: Create the relationship via the Client Intake form
NOTE: This process will work with both existing or non-existing accounts (this process will create accounts for those which are currently non-existing and will add accounts - either new or existing, to an existing account, to create the relationship and family). This method should not be used if you wish to add non-family members to the relationship.
Access the Client Intake form by clicking on the New Client button in your workflow...

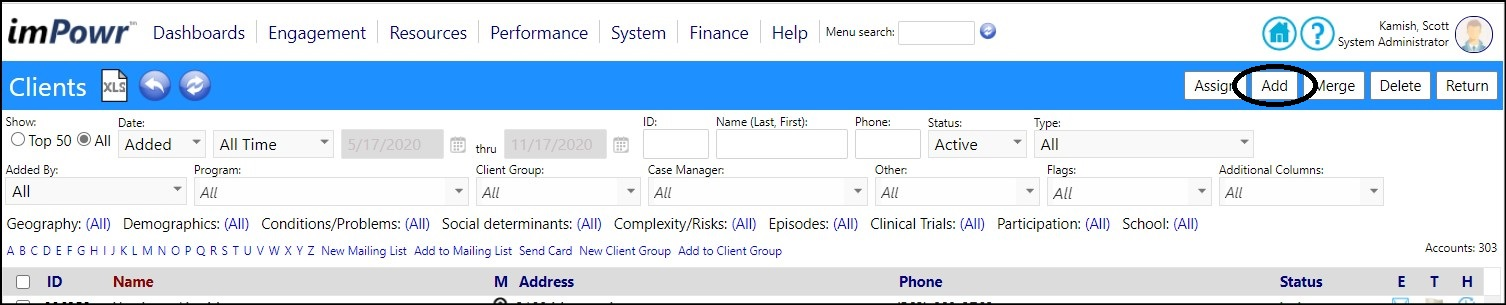
...or access the Client Intake form by clicking on Clients in the People section of the Engagement menu, and then clicking on Add.
The Intake form will open.
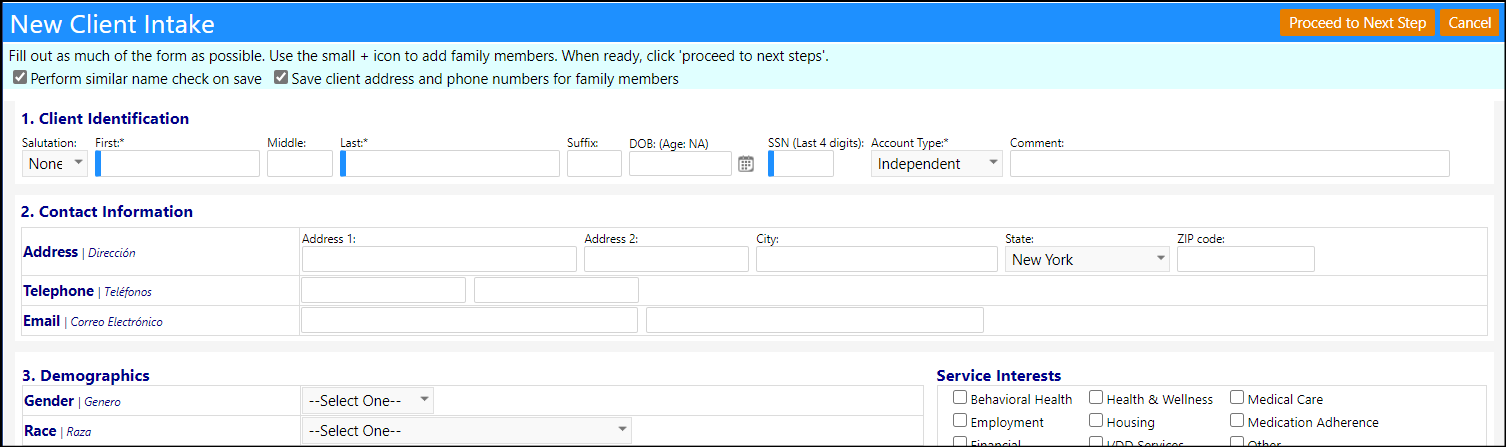
Enter the new or existing primary account's First and Last Name, andSSN (if required).
Select the Account Type of Independent or Dependent.
If this is for a new account, fill in as many of the fields as you can, with applicable information. If this is for an existing account, you do not need to fill in any other information other than the required fields (those with a blue bar on their left) until you get to section 4.
In Section 4 (Household Composition), click '+' to add new relationships (this will set up create a Client (Family) account and will establish the relationships panel in the individual account profile(s)).
Enter the family member's First and Last Name.
Select the Relationship.
Enter their Gender,Date of Birth, theirSchool (if applicable), and their Health Insurance information, if known.
If there are any special medical conditions to be aware of, check the Extended Details box and enter the information.NOTE: If there are other people in the family, please enter their information into this Household section too. Doing it this way will establish the family relationship in the system.
When you are done with entering all family members, answer the Prescreening Questions.
Click Proceed to Next Step.
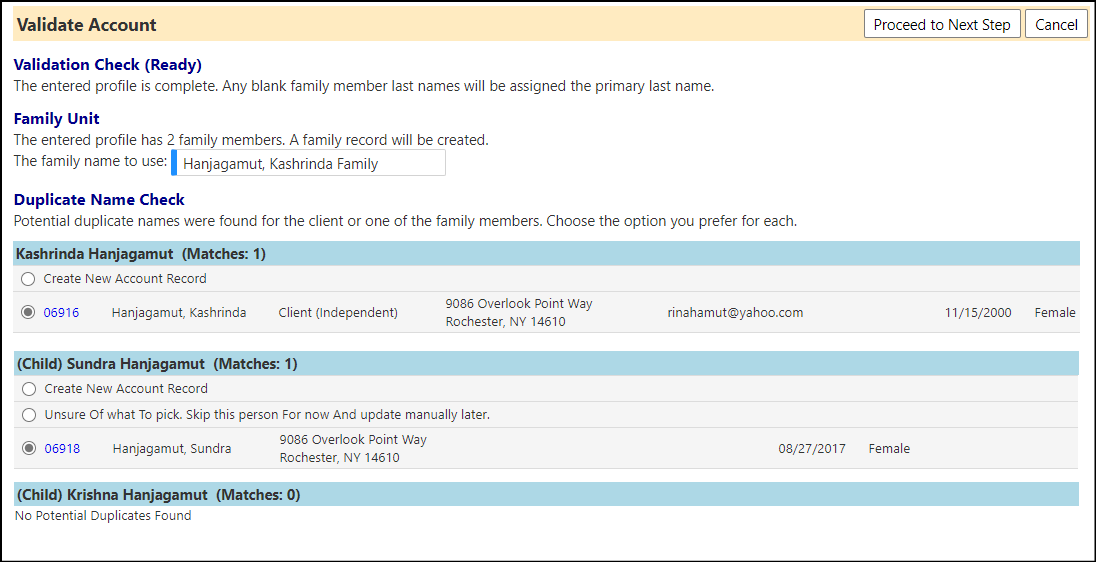
The Validate Account window will open. In this window, it will tell you a family account will be created, and it will provide you with the family name (you may change this name, but typically, the names consist of the primary person's last name followed by a comma and their first name).
If imPowr found any similar names in the system to the accounts you are referencing in your New Client Intake form, you must decide which to select for this process to continue.
If the name is the sameas the one you entered on your list, click the radio button to the left of that name to select it...otherwise, leave the select as Create New Account Record.

Or, if more than one family member account were added, and one already exists in imPowr:
When you are done, click Proceed to Next Step.
A confirmation window will display, telling you what will happen next.
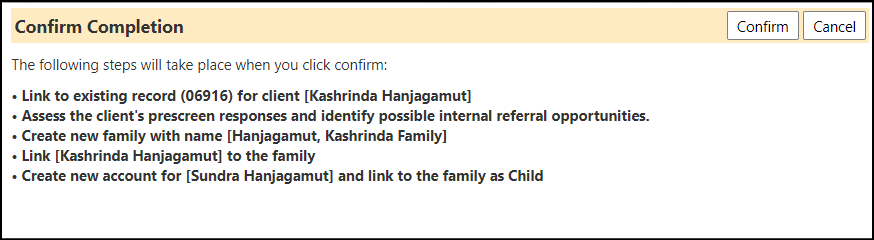
For Validate Account example #2, above...
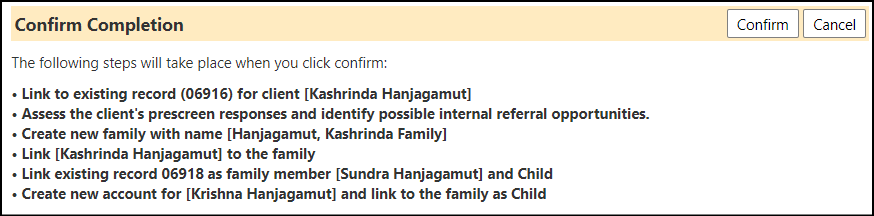
Click Confirm.
Your primary account will open, showing the new relationships which have been created.
If the account added was under 20 years old, they will be created with a Child Relationship. Otherwise, they will be created with a Family Member Relationship.
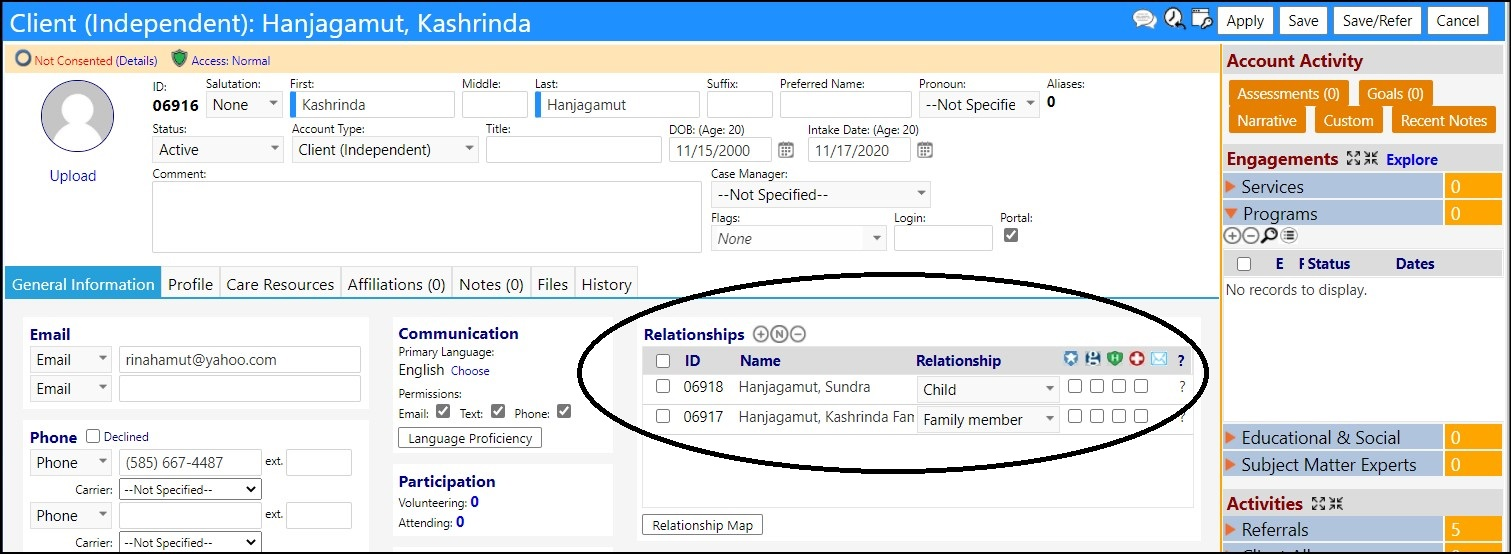
Click Save.
If you had entered more than one existing account into the New Client Intake Form, when the relationships are added, after saving and closing the first account, the other accounts will also open so you can see the relationship was also established in those accounts. Click Close to exit the window.
You are now done and your Client, Client family, and client relationship are now all created in imPowr.
DISCLAIMER: The characters, names, and events contained in our training documents and in our demonstrations are fictional. Any resemblance or similarity to any actual events, entities, or persons, whether living or dead, is purely coincidental and are purposely made for better visualization of the functionality of our software.